Start with an easier and more secure Dataverse integration with Azure Managed Identities! This powerful Azure feature offers a hassle-free authentication process, eliminating the traditional need for managing Client IDs and Secrets. In this guide, I’ll walk you through each step of leveraging Managed Identities, a method celebrated for its efficiency and robust security in the Azure environment.
Azure Managed Identities automate credential management, linking directly to Azure Active Directory (Azure AD). This simplifies access to Azure AD-authenticated services like Dataverse, significantly enhancing security and streamlining operations. By adopting Managed Identities, you embrace a future where intricate credential management is no longer a concern, making your Dataverse connection more seamless and secure.
Step 1: Create Your Managed Identity
- Log into the Azure Portal.
- Navigate to ‘Managed Identities’ and click ‘Create’.
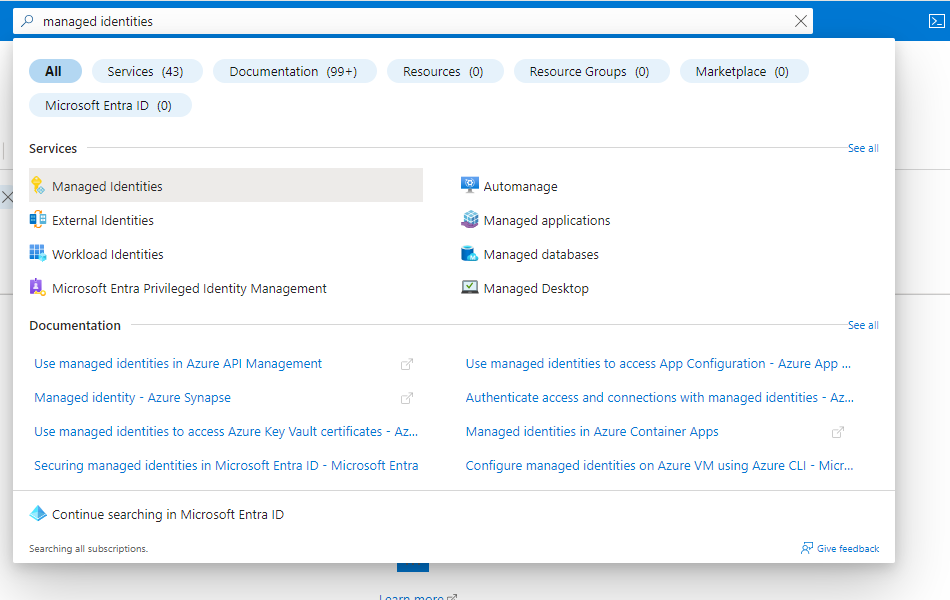
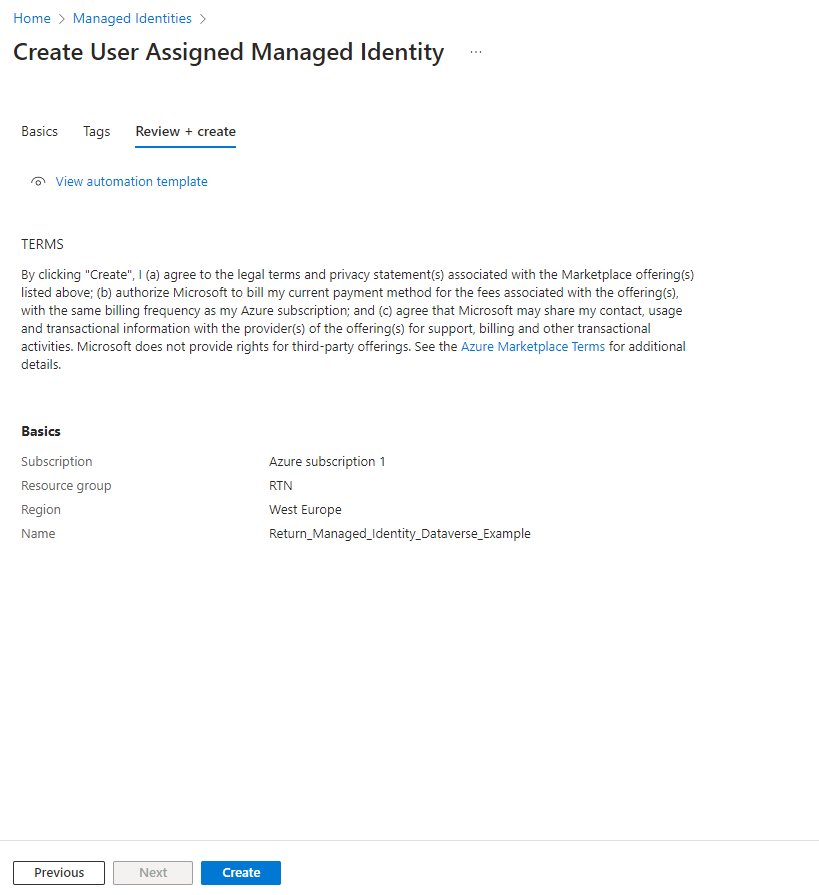
- Fill in the necessary details like subscription, resource group, and name.
- Once you’ve reviewed your choices, hit ‘Create’.
Step 2: Adding an Application User
- Go to the Power Platform admin center at https://admin.powerplatform.com.
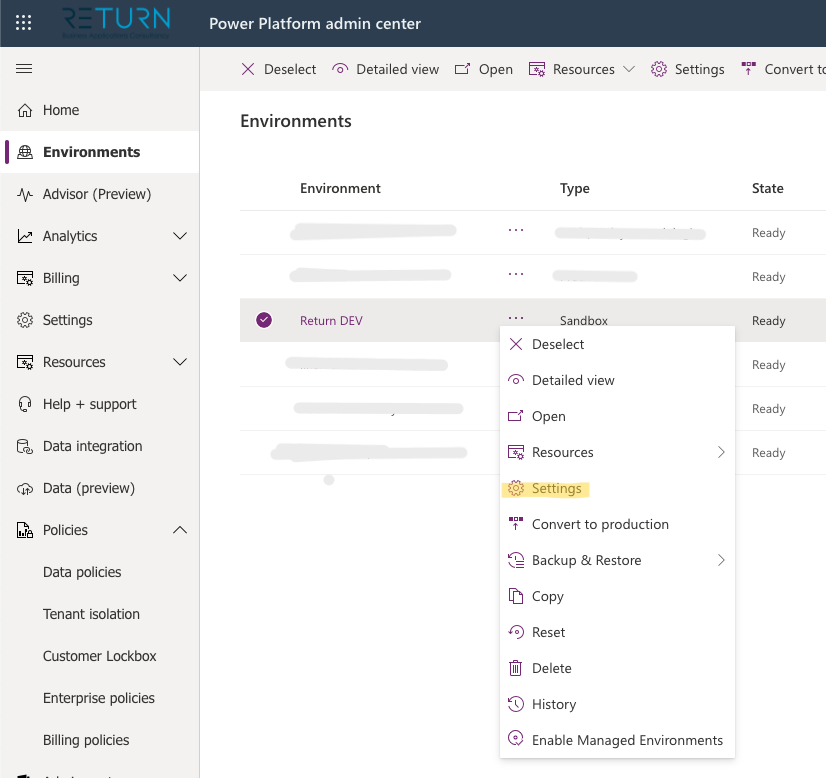
- Select your environment and navigate to settings
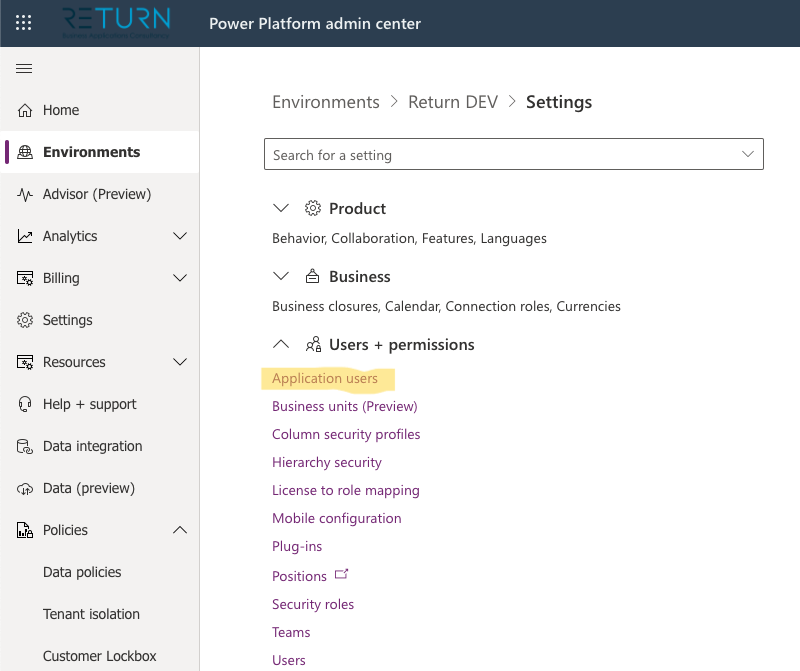
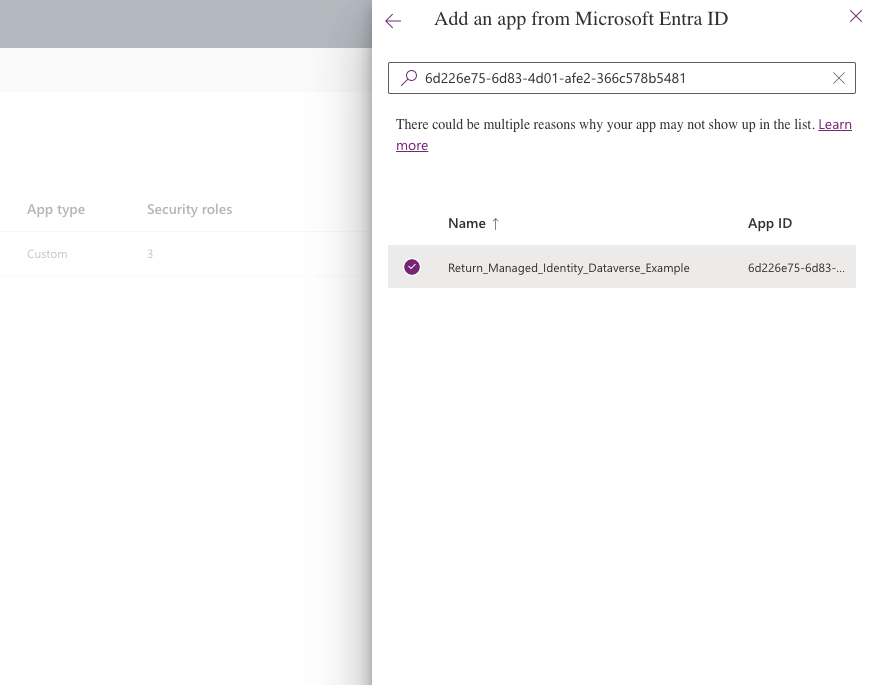
- Under ‘Users & permissions’, select ‘Application users’ and click ‘New app user’.
- Find your Managed Identity by name or ID, complete the form, and assign the necessary roles.
Step 3 (optional) : Connect from Logic Apps
- When working with Logic Apps, use the HTTP connector.
- Add the Authentication parameter.
- Set ‘Authentication Type’ to ‘Managed Identity’ and select your Managed Identity.
- Specify ‘Audience’ as your environment URL.
With these simple steps, you have now streamlined your connection to Dataverse using Managed Identity, ensuring a more secure and efficient authentication process. Embrace this change and experience the ease and enhanced security in your Dataverse interactions!
